

Blog
How to build shoppable images that drive purchases
Turn a lifestyle or product photo into a clickable showcase with product details, manually maintained prices, and links to your store.
Free forever plan · No credit card · Works in Wix, Webflow, WordPress, Shopify, Squarespace
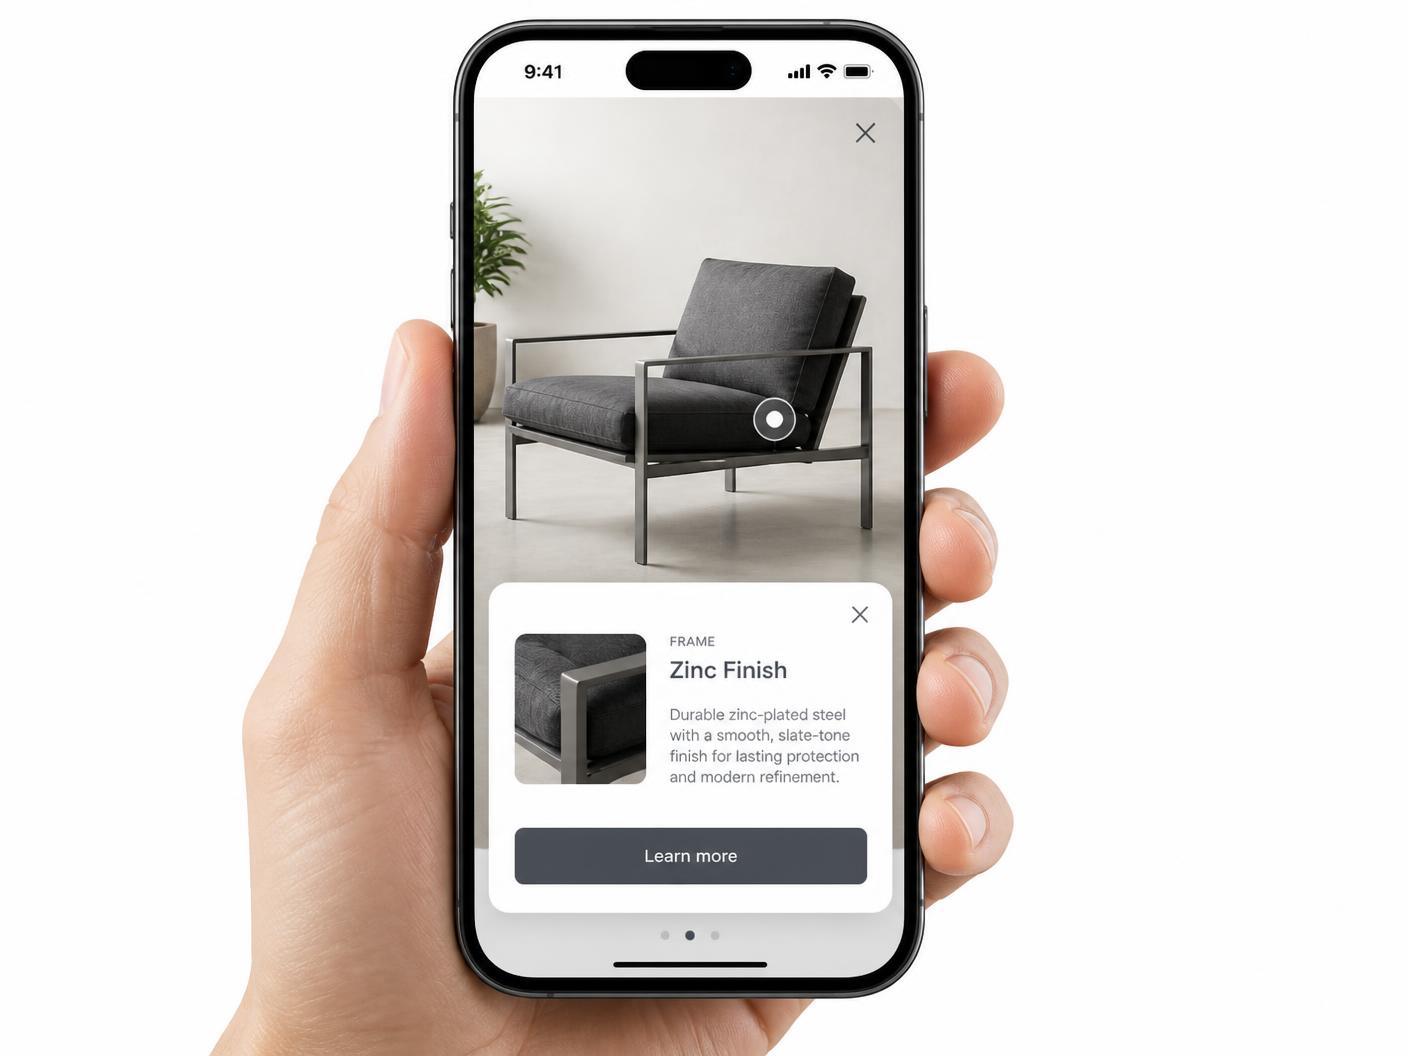
Tag every product in a scene
Click on each item in a lifestyle photo to add a product hotspot.
Price and CTA in every popup
Show price, a short description, and a direct 'Shop now' link without leaving the page.
Works anywhere, not just your store
Embed a shoppable image on a blog post, landing page, or link-in-bio page.
What you get
- 3–8 hotspots per scene keeps it scannable
- Show price and a clear CTA in every popup
- Match popup pricing exactly to the linked product page
- Works in blogs, homepages, newsletters, and link-in-bio pages
- One embed, update-once workflow across every placement
Updated
Set up a Product dot
Add a dot, open Content, and select Product. Add its title, description, product image, and destination link. Put any displayed price in the card content and keep it up to date yourself; Interactive Image does not synchronize store inventory or run checkout. The marker can match the Product type automatically, or you can customize it in Appearance. Preview the card, then test its link to the actual product page.
What makes an image 'shoppable'
A shoppable image is a regular photo — usually a lifestyle shot showing a product in context — with clickable hotspots placed directly on each item. Instead of a caption explaining "sofa, coffee table, and rug shown," each object becomes its own tappable target that opens a popup with the product name, price, and a link to purchase. The photo does the selling; the hotspots remove the friction of finding what's in it.
Choosing the right source photo
- Pick photos where individual products are visually distinct and not overlapping heavily.
- Favor natural, well-lit lifestyle shots over flat product-on-white photos — shoppable images work best when they sell a scene, not a single item.
- Make sure the photo resolution is high enough that hotspots don't need to sit on blurry or compressed areas.
- Avoid photos with more than 8–10 potential products; split a busy scene into two images if needed.
Writing hotspot content that sells
Each hotspot popup is a miniature product listing. Keep it tight and scannable:
| Element | Guidance |
|---|---|
| Product name | Match the exact name used on the product page |
| Price | Show it plainly; hidden pricing adds friction, not curiosity |
| Thumbnail | Include a clean product-only shot alongside the lifestyle context |
| CTA | One clear action — "Shop now" or "View product" — linking straight to checkout-ready page |
Placement and conversion considerations
A few practical details separate a shoppable image that converts from one that just looks interactive:
- Position hotspots on the item itself, not floating nearby — ambiguity about what's being sold kills trust fast.
- Use a subtle pulsing or static dot indicator so shoppers notice the image is interactive on first glance.
- Link each CTA to a product page that matches the price and variant shown in the popup — mismatches erode trust and increase bounce.
- Track which hotspots get clicked most; that data tells you which products in a scene are actually driving interest.
Where to use shoppable images
Shoppable images aren't limited to product detail pages. They work well in:
- Blog posts and lookbooks that round up an outfit, room, or gift guide.
- Homepage hero banners that highlight seasonal collections.
- Email newsletters (linking out to a hosted shoppable image page, since most email clients don't support embedded iframes).
- Link-in-bio pages, where a single shoppable image replaces a long list of separate product links.
Start with the shoppable image maker if you're building your first one, or browse the clickable image maker for a more general hotspot workflow.
Embedding on your storefront or CMS
Because the shoppable image is delivered as a single iframe, it drops cleanly into most storefront themes and page builders — including Wix, WordPress, and Webflow sites. Updating a price or swapping a product later means editing the hotspot once; every page with the embed reflects the change immediately.
Measuring what's working
Track hotspot clicks the same way you'd track any on-page CTA. If one product in a scene consistently gets clicked far more than others, that's a signal worth acting on — feature it more prominently elsewhere, restock it, or use the same photo angle for a follow-up shoppable image. For more general context on how interactive images fit into a page's content strategy, see our blog and the tool comparison hub.
Frequently asked questions
Do I need a specific ecommerce platform to use shoppable images?
No. A shoppable image is just an embed with hotspots that link out — it works alongside any storefront or checkout system.
Can a shoppable image include out-of-stock items?
Yes, but consider labeling them clearly in the popup ('Sold out — join waitlist') rather than linking to a dead-end product page.
Turn any image into a guided experience.
Free forever plan. Paste one iframe into your site and ship.
Create your interactive image