

For Webflow
Add interactive hotspot images to Webflow.
Build clickable product images, diagrams, maps, and graphics, then paste one responsive iframe into a Webflow Embed element.
Free forever plan · No credit card · Works in Wix, Webflow, WordPress, Shopify, Squarespace

Build your Webflow hotspot image here
Upload your image and click to place hotspots. Publish with a free account to get the snippet for a Webflow Embed element.

This is a live demo — nothing here is published yet. Create a free account to publish your image and get a one-line embed code for Wix, Webflow, WordPress, Squarespace or plain HTML, with hosted images, images and video in the cards, CTA buttons and edits that go live instantly. Free includes 1 published image with the Interactive Image badge; Pro removes the badge and unlocks white-label embeds.
Webflow Embed element
Paste the generated iframe into Webflow's native Embed component.
Responsive positioning
Percentage-based hotspots stay aligned as Webflow layouts change across breakpoints.
Designer-friendly workflow
Keep visual design in Webflow and manage hotspot content in Interactive Image.
What you get
- Works with Webflow pages and CMS templates
- No custom JavaScript required
- Responsive across Webflow breakpoints
- Useful for product tours and visual explainers
- Update hotspots without editing Webflow layout
Where the Embed element goes, and how to size it
Webflow's Embed element (Add panel → Components → Embed, or the keyboard shortcut for custom code) accepts raw HTML. Drop it inside the div block or grid cell that already has the width you want, set the element to 100% width, and let the snippet's aspect-ratio wrapper control height. Fixed pixel heights are what cause letterboxing and stray scrollbars at smaller breakpoints.
<div style="position:relative;width:100%;aspect-ratio:16/9">
  <iframe src="https://interactiveimage.com/embed/YOUR-ID"
    style="position:absolute;inset:0;width:100%;height:100%;border:0"
    scrolling="no" loading="lazy" title="Interactive image"></iframe>
</div>
Replace the ratio with your image's real ratio — the Embed panel bakes it in for you automatically when you copy a fresh snippet.
Using it on a CMS collection template
One template can serve a different interactive image per collection item, which is the pattern Webflow agencies usually want for product catalogs and property listings:
- Add a plain-text field to the collection — call it "Embed URL".
- Paste each item's embed URL into that field in the CMS.
- On the collection template page, add an Embed element inside the collection item and drop the field into the iframe's
srcusing the purple field picker. - Publish. Each item now renders its own hotspot image from one layout.
Add a second field for the aspect ratio if your images differ in shape, and drop it into the wrapper's aspect-ratio value.
Why not build hotspots with Webflow interactions?
You can absolutely position absolute divs over an image and wire hover interactions to reveal tooltips — it's a legitimate Webflow technique. The cost shows up later: every marker is a manual absolute position you re-check at each breakpoint, content edits mean opening the Designer, and a client can't update a label without your help. An embed keeps hotspot data out of the layout entirely, so the same image can be edited by a non-designer and updated across every page at once. If you'd rather see the tradeoffs in detail, read Interactive Image vs Webflow interactions or the CSS, SVG, and hotspot comparison.
Troubleshooting a Webflow embed
| Symptom | Cause | Fix |
|---|---|---|
| Blank area in the Designer canvas | Designer does not execute embedded iframes | Check in Preview or on the published site |
| Embed has zero height | Parent is a flex or grid child with no defined size | Set the Embed element width to 100% and give the wrapper a ratio |
| Letterboxed at tablet or mobile | Fixed pixel height set at the desktop breakpoint | Clear height back to auto and let aspect-ratio drive it |
| CMS embed shows a broken URL | Field dropped outside the quotes, or the field is empty for that item | Re-place the field inside src="…" and fill it for every item |
| Embed disappears after publishing to a custom domain | Mixed content — an http:// src on an https:// page | Always use the https:// embed URL |
| Page interactions fight the embed | A scroll or hover interaction is transforming the parent | Move the interaction to a sibling wrapper, not the embed's parent |
Keeping the page indexable around the embed
Crawlers do not read the contents of a third-party iframe, so the hotspot text inside the embed is not page content for SEO purposes. That is fine as long as the Webflow page carries the substance itself:
- Keep a real
h1and intro paragraph in Webflow above the embed, describing what the image shows. - Repeat the key specs, room names, or product names as normal Webflow text or a rich text block below the embed. Visitors skim it, crawlers index it.
- Give the iframe a descriptive
titleattribute — it is what screen readers announce for the frame. - On CMS templates, bind that supporting copy to collection fields so it stays specific per item rather than boilerplate.
Setup at a glance
Webflow · Embed element inside any section or grid
- Time
- About 5 minutes
- Requirement
- Any Webflow site plan that allows custom code
- Element
- Embed (custom code)
- CMS pages
- Supported
- Interactions
- Unaffected
Step by step
How to add an interactive image to Webflow
Five steps, no developer. Everything below happens once — after that you edit hotspots in Interactive Image and your Webflow page updates on its own.
- 01
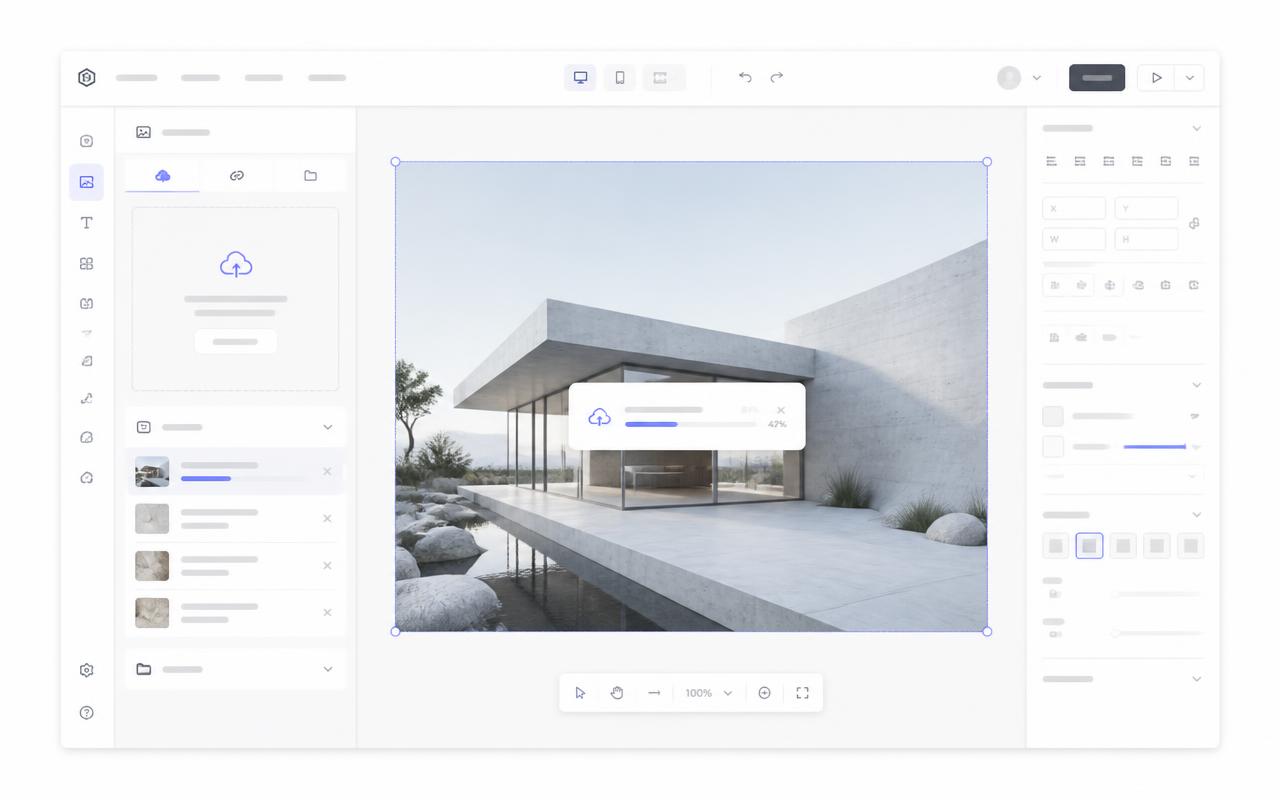
Upload your image
Create the interactive image and upload your artwork at full resolution.
- 02
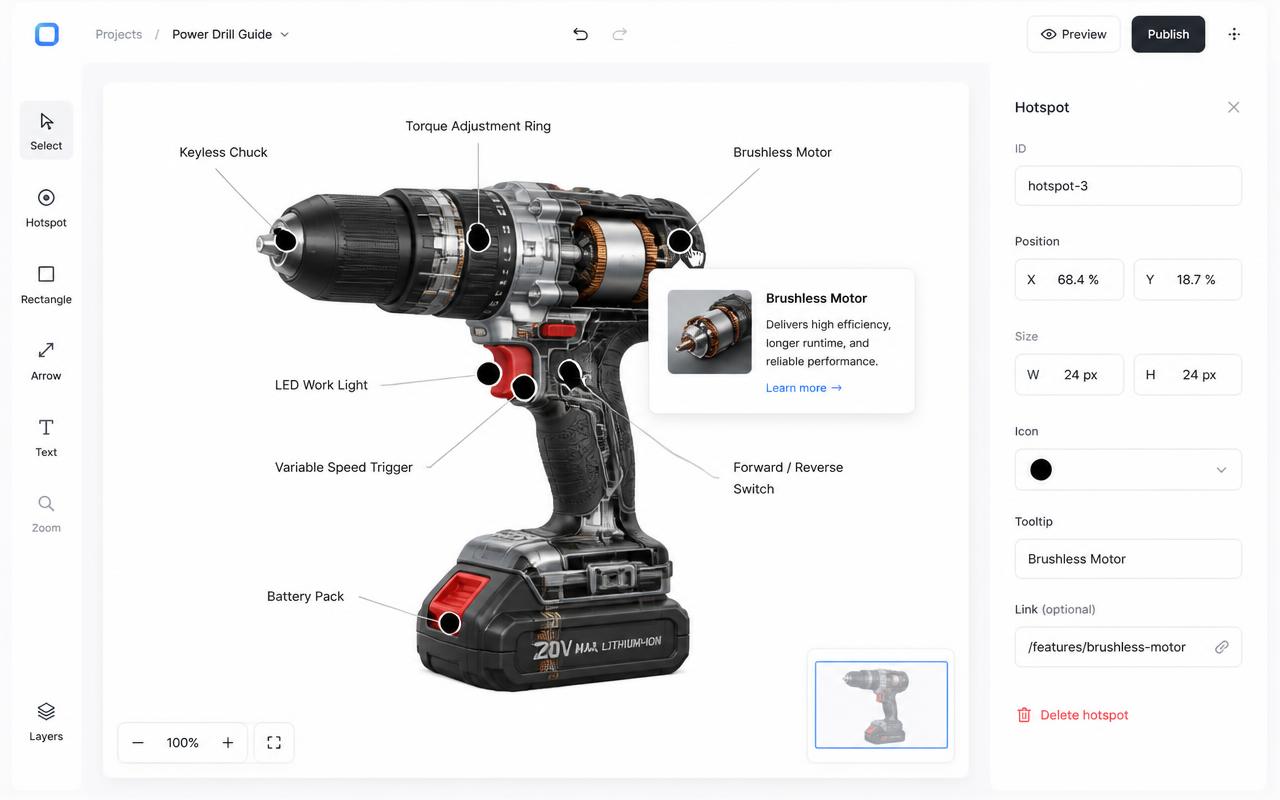
Design the hotspots
Place dots, set marker style and size, and write the card content — including media and CTA buttons.
- 03
Copy the snippet
Copy the responsive iframe from the Embed panel.
<div style="position:relative;width:100%;padding-top:56.25%">
  <iframe src="https://interactiveimage.com/embed/YOUR-ID"
    style="position:absolute;inset:0;width:100%;height:100%;border:0"
    scrolling="no" loading="lazy"></iframe>
</div>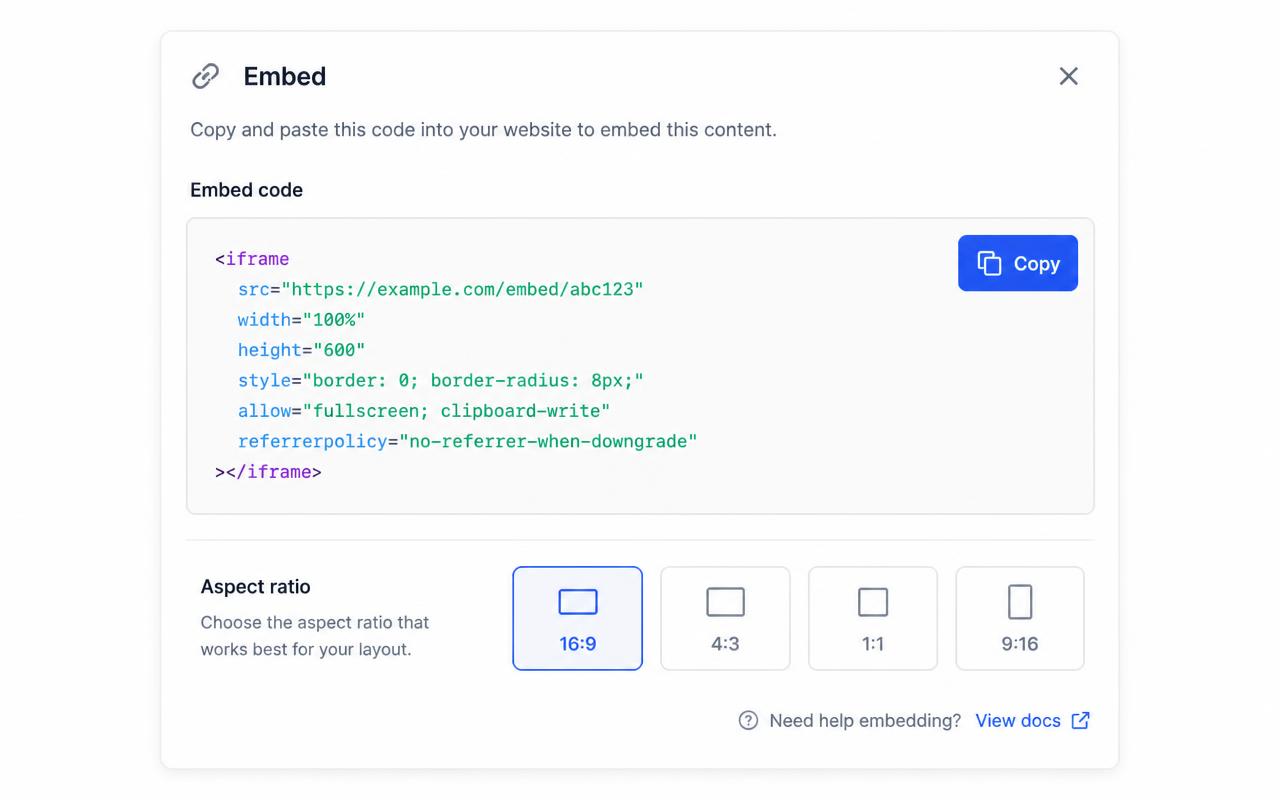
- 04
Drop in a Webflow Embed
Drag an Embed element into your section, paste the snippet, and save. Set the parent div to 100% width so the iframe scales with your layout.
- 05
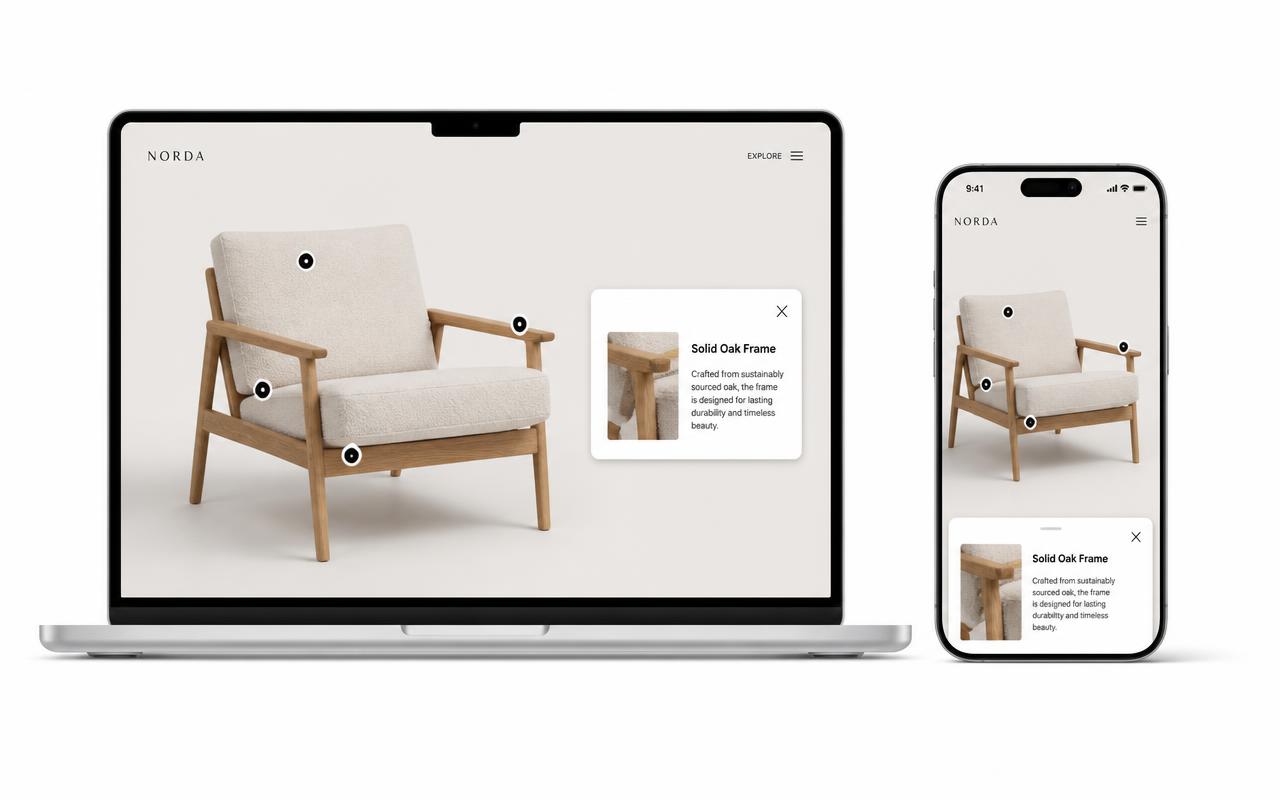
Check breakpoints, then publish
Step through desktop, tablet, and mobile in the Designer. Because hotspots are percentage-based, they stay locked to the artwork at every breakpoint.
Troubleshooting
Fixes for the Webflow issues people hit
The embed renders blank in the Designer
Webflow doesn't always render third-party iframes inside the Designer canvas. Use Preview mode or the published site to verify.
Where do I choose the map type and edit a dot?
In the account dashboard, New Map offers Image map or Mapbox map. This choice is fixed after creation. For image maps, choose Upload Background Image and Add new dot; geographic maps offer address search and Import locations. Select a dot and use Content for its type, text, media, and links, Appearance for that dot, and Map settings for shared defaults. Enable embedding and copy the current snippet before publishing it on your website.
The embed looks cropped or has scrollbars
The iframe height doesn't match the image aspect ratio. Copy a fresh snippet from the Embed panel — it bakes the exact ratio into a padding-based wrapper — or set the iframe height to width ÷ aspect ratio.
Hotspots look slightly offset from the artwork
That happens when the container letterboxes the image. Interactive Image measures the rendered image box, so hotspots stay glued to the artwork — just make sure you didn't force a fixed height that differs from the image ratio.
Changes aren't showing on the live site
Save in the editor, then hard-refresh the published page. The embed always renders the latest saved version — you never need to re-paste the snippet unless the aspect ratio changed.
Continue exploring
Frequently asked questions
Do I need a paid Webflow site plan?
Webflow custom code and embeds depend on your Webflow plan. If your plan supports Embed elements, Interactive Image works with it.
Can I style hotspot colors?
Yes. Set marker style, color, size, and popup content in Interactive Image before embedding.
Why is the embed blank in the Webflow Designer?
The Designer canvas does not execute iframes. Use Preview mode or view the published page — the embed renders normally there.
Can one Webflow CMS template show a different interactive image per item?
Yes. Add a plain-text field for the embed URL, then bind that field into the iframe's src inside an Embed element on the collection template. Each item renders its own hotspots from one layout.
Does the embed count against Webflow's element or custom code limits?
It is a single Embed element containing a few lines of HTML, so its footprint is minimal. Webflow's 10,000-character per-embed limit is far more than the snippet needs.
Will hotspots stay aligned across Webflow breakpoints?
Yes, as long as you leave the Embed element's height on auto. Hotspots are stored as percentages of the image, so they scale with it rather than drifting at narrower breakpoints.
Does an embedded interactive image hurt my page SEO?
No, but crawlers cannot read text inside a third-party iframe. Keep a real heading, intro copy, and the key names or specs as normal Webflow text around the embed so the page still has indexable content.
Turn any image into a guided experience.
Free forever plan. Paste one iframe into your site and ship.
Create your interactive image