

For Google Sites
Clickable maps and diagrams inside Google Sites.
Insert → Embed, paste, publish. Campus maps, org charts, and annotated diagrams that stay accurate on desktop and phones.
Free forever plan · No credit card · Works in Wix, Webflow, WordPress, Shopify, Squarespace
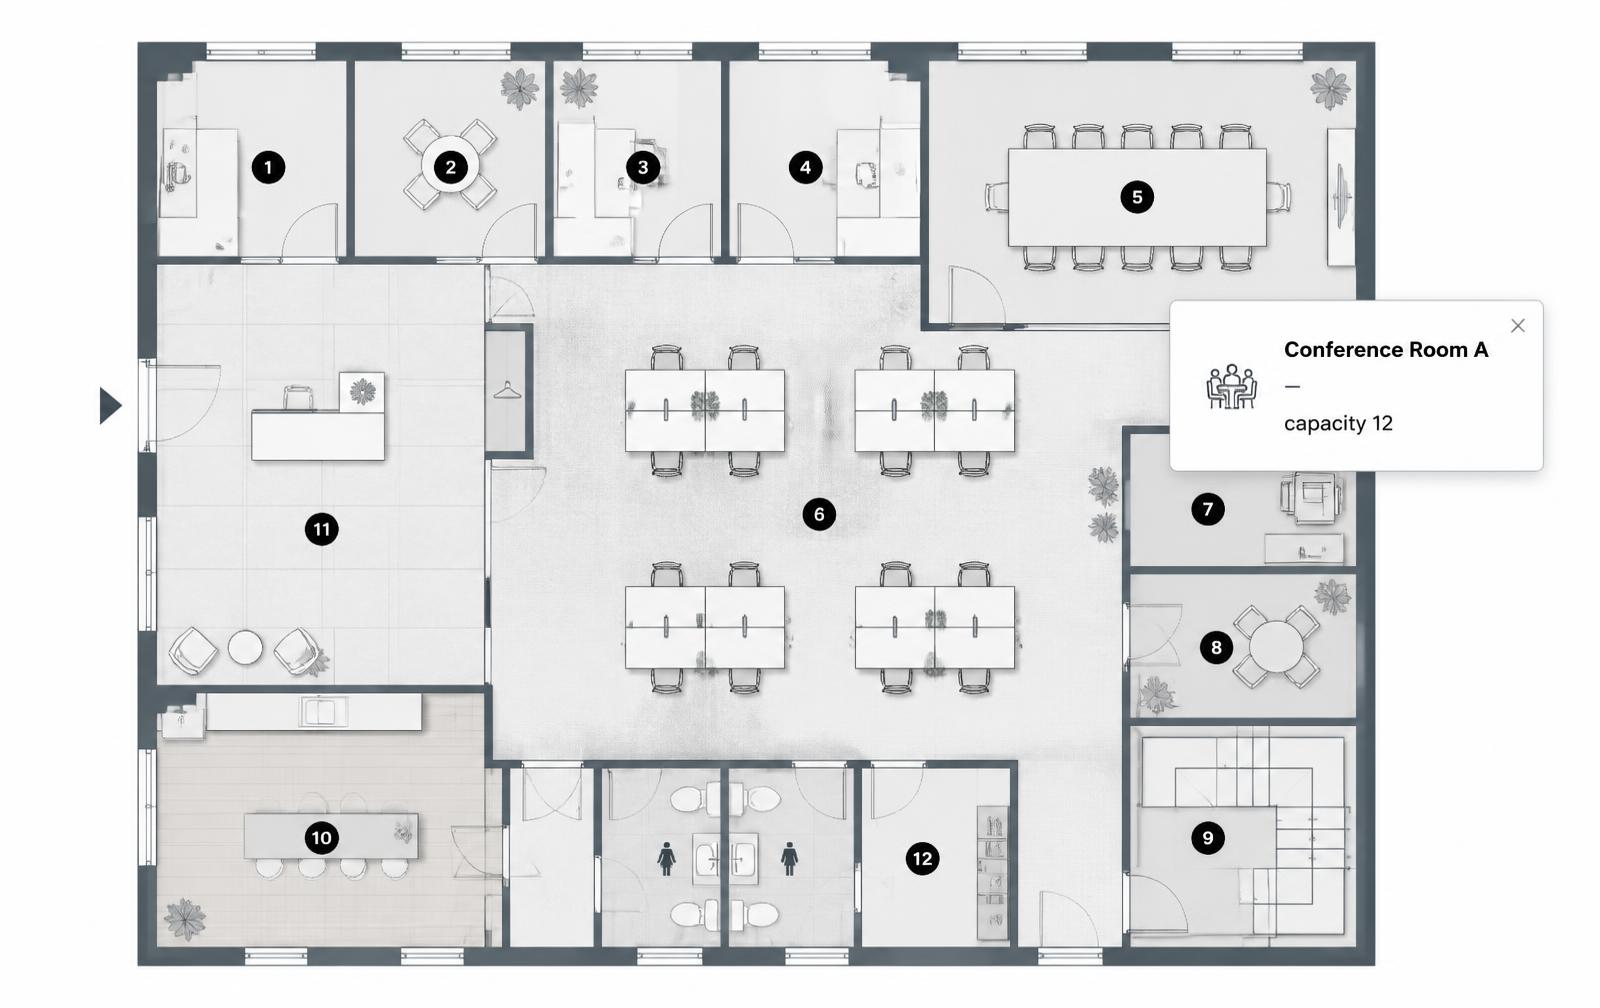
Build your Google Sites map or diagram here
Upload a plan, chart, or photo and click to place hotspots. Publish with a free account, then paste the URL into Insert → Embed in Google Sites.

This is a live demo — nothing here is published yet. Create a free account to publish your image and get a one-line embed code for Wix, Webflow, WordPress, Squarespace or plain HTML, with hosted images, images and video in the cards, CTA buttons and edits that go live instantly. Free includes 1 published image with the Interactive Image badge; Pro removes the badge and unlocks white-label embeds.
No code required
Paste an iframe snippet or just the URL. Google Sites handles the rest.
Free with any Google account
Nothing to buy on the Google side, and a free Interactive Image plan publishes one image.
Built for schools and intranets
Campus maps, department directories, org charts, lab and equipment diagrams.
What you get
- Insert → Embed → Embed code, or By URL
- Hotspots stay aligned at every block size
- Update the image without republishing the site
- Tappable on Chromebooks, tablets, and phones
- Cards can hold photos, video, and links to Drive or Classroom
Embed code or By URL — which tab to use
Google Sites gives you two ways in, and they behave slightly differently:
- By URL is the quickest. Paste the embed URL and Google Sites builds the iframe for you. Use this when you're happy to size the block by dragging.
- Embed code takes the full snippet. Use it when you want the wrapper's aspect-ratio behaviour, or when the By URL tab refuses a link it doesn't recognise.
Either way, the one hard requirement is that the interactive image is published. Google Sites fetches the URL as an anonymous visitor, so anything gated renders as an empty block.
Sizing the block so nothing is cropped
Google Sites doesn't read your image's aspect ratio — it uses whatever height you drag the block to. The arithmetic is simple: divide the block's width by the image's aspect ratio. A 16:9 image in a 960px-wide block wants about 540px of height. A 4:3 image wants 720px.
Because that height is fixed across breakpoints, very wide panoramas letterbox badly on phones. If mobile matters, prefer a crop closer to 4:3 or 3:2, and re-check the block after you change the section layout — Google Sites won't recompute it for you.
What schools and internal teams build with this
Campus wayfinding maps with a card per building; departmental org charts where each portrait opens a role and contact; lab and workshop equipment diagrams linking to safety procedures; annotated screenshots in an IT help page. If your image is a building layout, the floor plan tool covers room-by-room guidance, and interactive images for education has classroom-specific examples.
Troubleshooting the five things that actually go wrong
- Blank or grey block. The URL isn't public. Open it in a private window: if you see a login screen, publish the image and paste the public URL, not the editor one.
- Inner scrollbar. The block is shorter than the image. Drag it taller until the scrollbar disappears — width ÷ aspect ratio is the target height.
- "By URL" refuses the link. Switch to the Embed code tab and paste the full iframe snippet instead.
- Works for you, blank for students. A Workspace admin has restricted third-party iframes for that org unit. Only an admin can lift it.
- Hotspots look off after a layout change. The markers are percentage-based so they can't drift, but a shorter block crops the image. Resize the block, not the hotspots.
Why Google Sites' own image linking isn't enough
Google Sites lets you attach a single link to a whole image, and that's the ceiling — one image, one destination, no hover text, no card, no second region. For a campus map or org chart you need many regions on one picture, each with its own label, photo, and link. That's exactly the gap an image map fills, and it's why people reach for an embed rather than the built-in link field.
Setup at a glance
Google Sites · Insert → Embed → Embed code (or By URL)
- Time
- About 4 minutes
- Requirement
- Any Google account — new Google Sites
- Menu
- Insert → Embed
- Accepts
- Embed code or URL
- Cost
- Free with any Google account
Step by step
How to add an interactive image to Google Sites
Five steps, no developer. Everything below happens once — after that you edit hotspots in Interactive Image and your Google Sites page updates on its own.
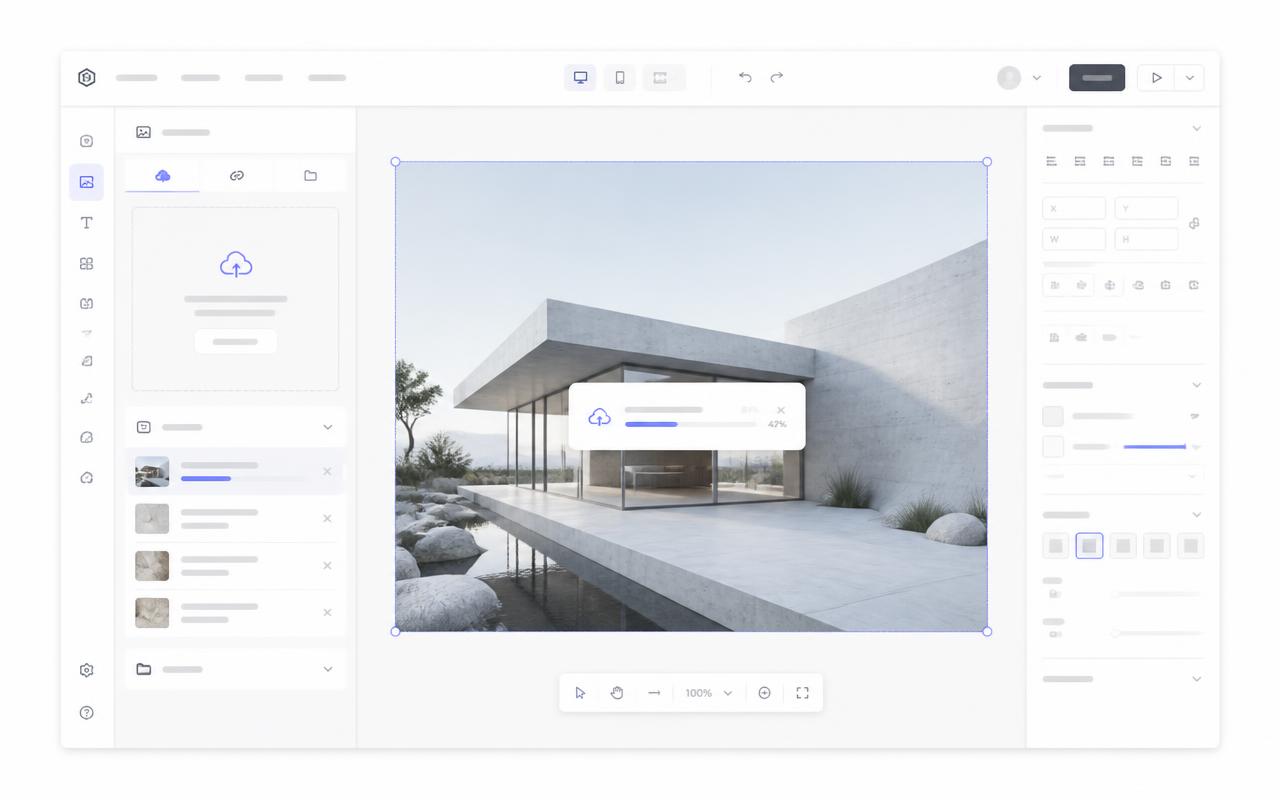
- 01
Upload your image
Create the interactive image and upload your campus map, org chart, floor plan, or annotated screenshot.
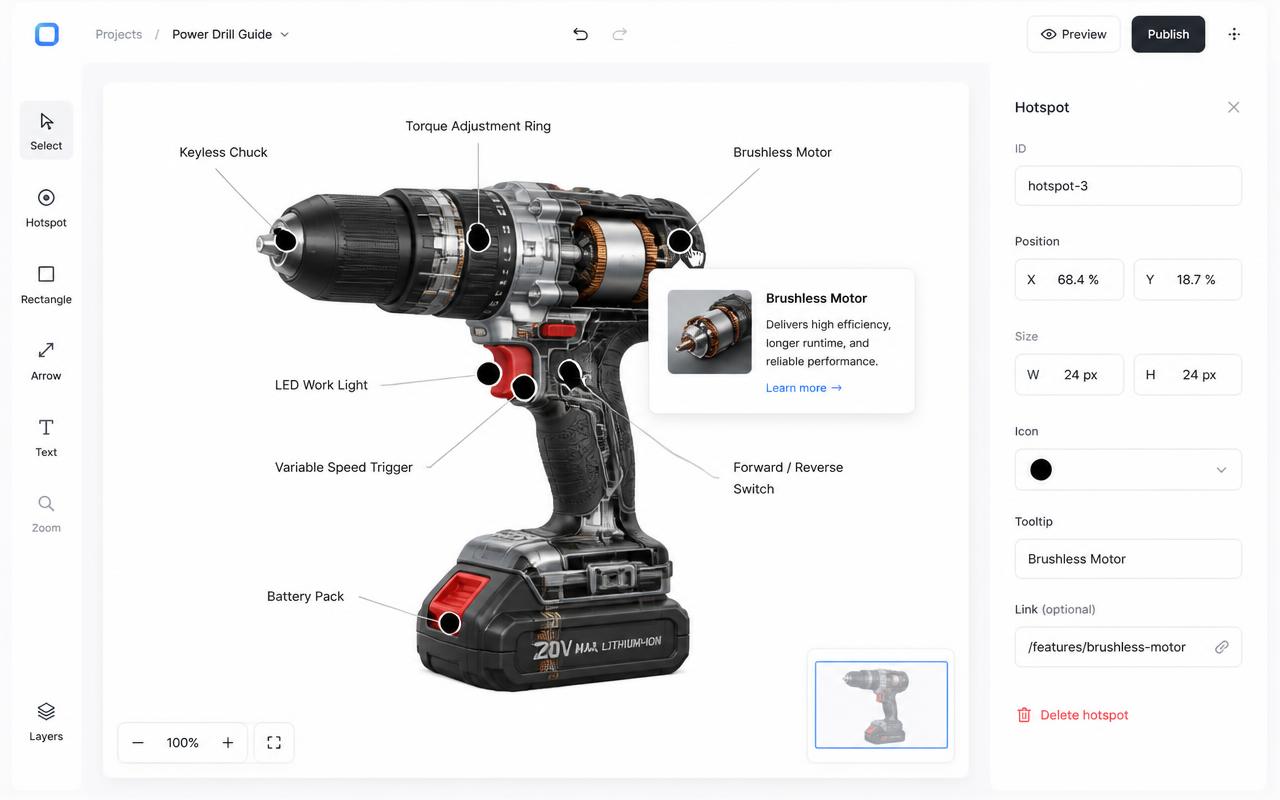
- 02
Place the hotspots
Click each room, department, or feature to drop a dot, then write the card copy and links.
- 03
Copy the embed
Copy the responsive iframe from the Embed panel, or just the plain URL if you prefer the By URL tab.
<div style="position:relative;width:100%;padding-top:56.25%">
  <iframe src="https://interactiveimage.com/embed/YOUR-ID"
    style="position:absolute;inset:0;width:100%;height:100%;border:0"
    scrolling="no" loading="lazy"></iframe>
</div>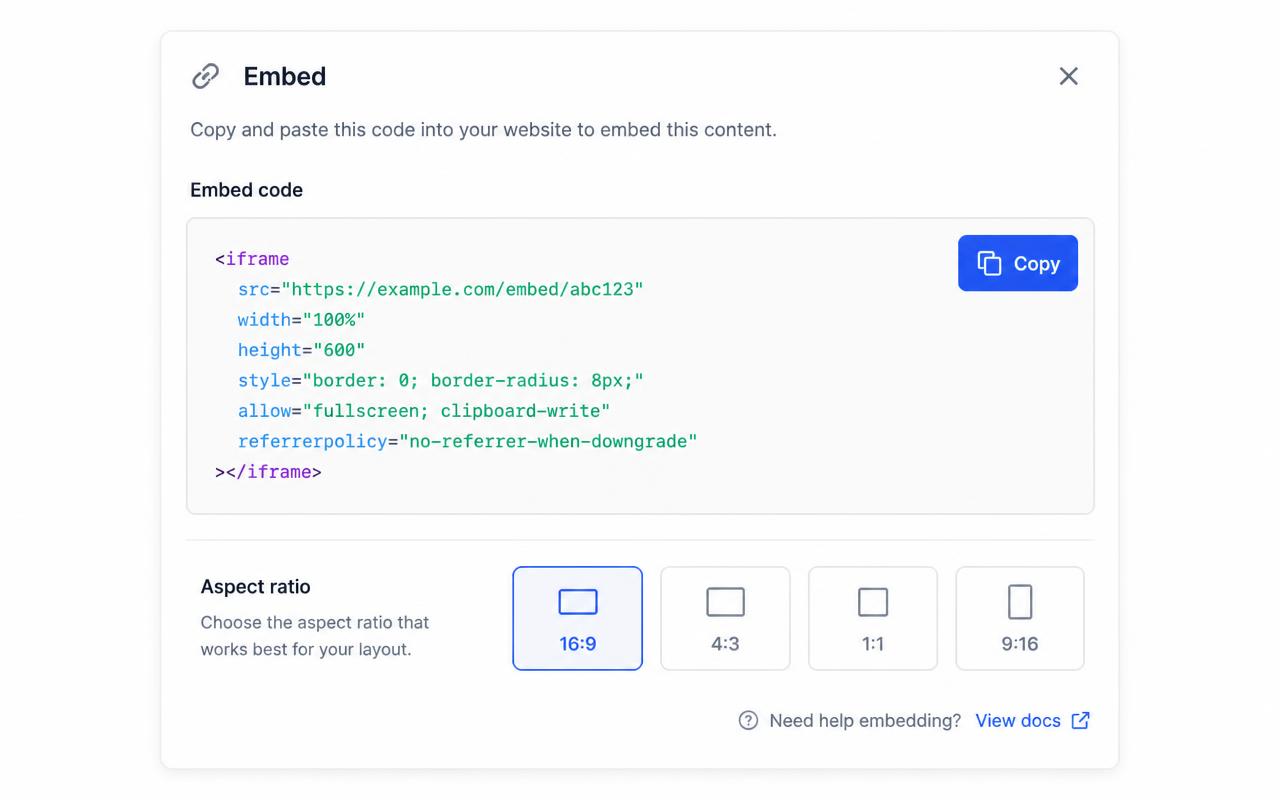
- 04
Insert an Embed block
In Google Sites click Insert → Embed. Use the "Embed code" tab and paste the snippet, or the "By URL" tab and paste the embed URL, then click Insert.
- 05
Resize and publish
Drag the embed block's handles to the width and height you want, preview on mobile with the phone icon, then Publish.
Troubleshooting
Fixes for the Google Sites issues people hit
Google Sites shows a grey box or "can't be embedded"
The URL must be public. Publish the interactive image first, then re-insert. Private preview URLs will not render for visitors.
The embed has its own scrollbar
Google Sites uses the block height you drag, not the aspect ratio. Resize the block until the whole image fits — roughly block width ÷ image aspect ratio.
It looks fine on desktop but cropped on phones
Google Sites keeps the embed's fixed height on mobile. Choose a less wide image crop, or accept a slightly taller block so nothing is clipped at narrow widths.
Where do I choose the map type and edit a dot?
In the account dashboard, New Map offers Image map or Mapbox map. This choice is fixed after creation. For image maps, choose Upload Background Image and Add new dot; geographic maps offer address search and Import locations. Select a dot and use Content for its type, text, media, and links, Appearance for that dot, and Map settings for shared defaults. Enable embedding and copy the current snippet before publishing it on your website.
The embed looks cropped or has scrollbars
The iframe height doesn't match the image aspect ratio. Copy a fresh snippet from the Embed panel — it bakes the exact ratio into a padding-based wrapper — or set the iframe height to width ÷ aspect ratio.
Hotspots look slightly offset from the artwork
That happens when the container letterboxes the image. Interactive Image measures the rendered image box, so hotspots stay glued to the artwork — just make sure you didn't force a fixed height that differs from the image ratio.
Changes aren't showing on the live site
Save in the editor, then hard-refresh the published page. The embed always renders the latest saved version — you never need to re-paste the snippet unless the aspect ratio changed.
Continue exploring
Need it built for you?
Big maps, bulk hotspots, custom designs or integrations, built by our team at Upcode.
Turn any image into a guided experience.
Free forever plan. Paste one iframe into your site and ship.
Create your interactive image